Woodworking

578 readers
1 users here now

founded 2 years ago
MODERATORS
1


I made most of these objects besides the chemex collar and the dark coffee scoop. Wouldn't want to mislead anyone on the internet, that would be crazy.

2


I've been trying to get into greenwood carving. I did this with a stanley blade and a tiny 6mm curved palm gouge. I need a hook knife for sure, that gouge was painful to use.

3


So I park my snow blower in the garage and would like the snow residue to melt in place and not go all over.

I built this giant tray with a ramp so I can push the blower on it, that way the snow will stay on the tray.

I will caulk the seams and paint it with some resistant paint but I'll like to either glue a tarp on it, or some other plastic material or perhaps use some special coating so it lasts a few years.

The "floor" of the tray is OSB (aspenite?). Not the best for this is what I had and this project is more of an experiment for me.

Any recommendations?

4


I built this mallet over the summer. The sides are covered with leather to, hopefully, keep whatever I bang undamaged.

5


So I've long dreamed of designing & making my own computer desk, and I love the things I've seen people do with epoxy resin. After poking around online for a few months, I found a few posts that gave me sufficient inspiration (see below) to come up with a design concept.

I had two questions for the community here, hoping to get some advice:

  1. For that innermost rectangle (the one with all the triangles), ideally they'll be spaced out evenly across the entire available area; what I can't figure out is how I'll ensure they keep their positions while I'm pouring resin in between those cracks. Maybe a light application of caulk to "glue" each triangle in place to the bottom of the mold when I'm pouring? Or should a run a small piece of wood behind each row or column of triangles to mount them onto? I feel like that might detract from the aesthetic look I'm going for, but probably not as much as "screwed up triangle placement" would...
  2. Also for that innermost rectangle, I hadn't intended to fill it entirely with resin, in order to save cost/weight. The space is 2.5" deep, but the triangles will be only 0.75" deep. Can I get away with maybe doing a 1.5" epoxy pour in there, or is it likely this would compromise the structural integrity too much?

Any other advice for doing epoxy resin pours would be appreciated, I'm excited to begin working on this and simultaneously terrified I'll screw it up and waste all the materials I've been compiling.

6


Finished two simple projects to blow off steam and get back to woodworking with random boards and scraps laying around.

Left is a mini table made from 13" rosewood board and my first attempt at miter cuts and biscuits. 18" tall and 20" wide. For those that didn't know, rosewood's color will continue to depend with age so I look forward to see what it looks like in a few years.

Right is a basic cutting board made with a bunch of scraps from various cherry and walnut projects. Been laying in the garage for more than a year. Still have more but got tired of ripping. Both finished with Odie's oil.

7


I bought an Ooni pizza oven late last year and only afterwards realised I don’t have a good place for it. A decking project ensued to create new BBQ Central.

After several weekends of woodworking the main structure is ready. Now I can focus on looking for outdoor kitchen units, planing layout and finding a worktop.

8
1
BBQ decking (feddit.uk)
submitted 11 months ago* (last edited 11 months ago) by JohnSmith@feddit.uk to c/woodworking@lemmy.world


I bought an Ooni pizza oven late last year and only afterwards realised I don’t have a good place for it. A decking project ensued to create new BBQ Central.

After several weekends of woodworking the main structure is ready. Now I can focus on looking for outdoor kitchen units, planing layout and finding a worktop.

9
1
submitted 1 year ago* (last edited 1 year ago) by BradleyUffner@lemmy.world to c/woodworking@lemmy.world


https://xkcd.com/3067/

ALT: Unfortunately, SawStart is one-use-only. Once started, the blade cannot be stopped, and must be replaced with a fresh blade while the running one is carefully disposed of.

10


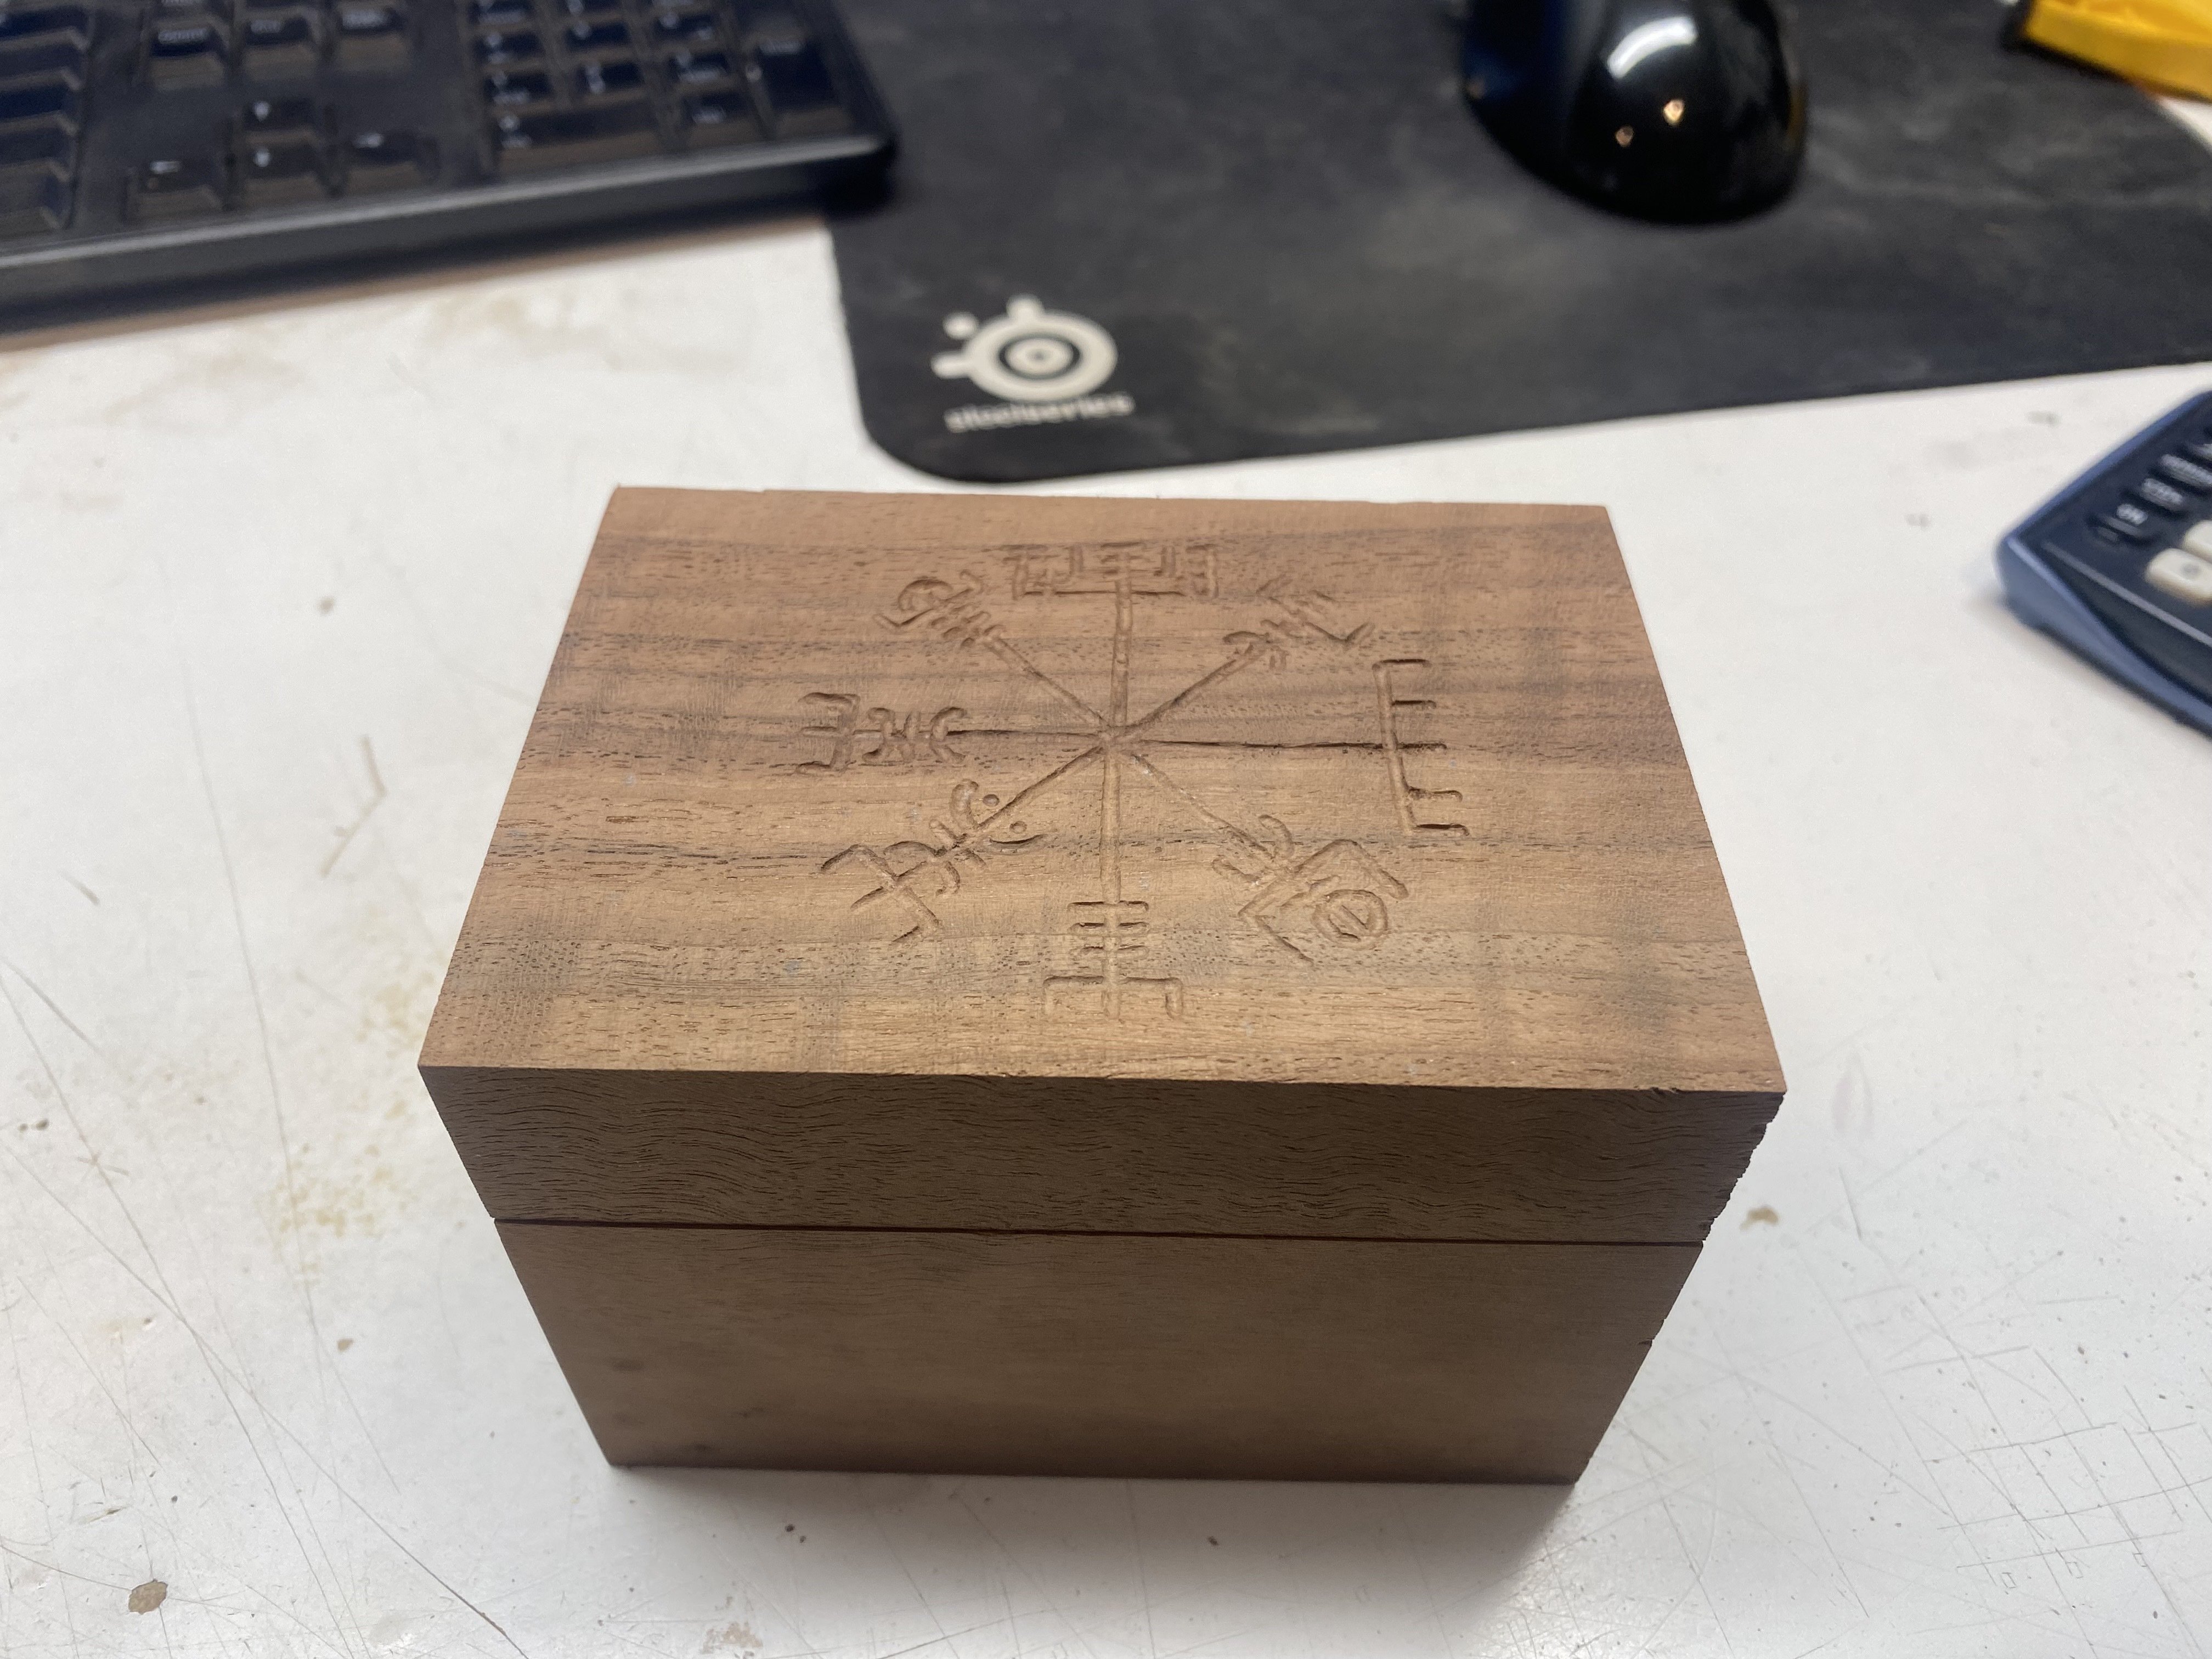
Working on a Christmas gift. I got the wood scrap, but I think it’s walnut. Eventually planning to polyurethane and fill in the engraving with black paint, but I’m stuck on how/weather to stain it.

I have a few stains from various projects, but on a sample piece they showed up really dark, and didn’t show the texture that well. It’s a little too late to do boiled linseed oil.

What would you recommend?

11


I made three sets of classroom mailboxes, for passing in papers / storing journals etc. Sides and back are 3/4" plywood, shelves are 1/4" plywood. Corners are rabbet and dado joints, my first time doing that. I did the cuts on my table saw. (I tried to route them, but didn't get as clean a cut as I'd like with the cheap Ryobi bits I had.) Shelves slide into dados. The sides/centeres are designed so one fence location could cut the top and bottom dado. I didn't have a dado stack, and am using a Shopsmith which has the table saw blade arbor on a quill, so I set the quill stop for my dado width and used that to make multiple cuts slightly apart. That worked fairly well but must have been slightly off on some cuts where it was very hard to slide the 1/4" plywood shelves in; I ended up sanding the edges of some slightly thinner.

12


Hi all!

I think the title says it - I would like to build an adjustable height desk out of wood and currently think of ideas to do that. The standard options online tend to be sort of ugly imho, really expensive, and/or have various electronic components that can fail and are hard to repair.

Some features that would be great to have:

  • adjusting height doesn't take too long. It should be feasible on a daily basis, e.g., for standing in the morning and then sitting down, standing up after lunch again etc.
  • adjusting should also be feasible by one person alone
  • at least 2 different heights (standing and sitting), but it doesn't need to be super flexible otherwise.
  • it can't be attached to the ceiling for example, because I'm not allowed to drill holes here
  • robust enough to hold the weight of a monitor and things office workers have on their desk (maybe a water bottle, coffee mug, 2-3 books, their arms, ...)

My first thought was this table template by Enzo Mari. It allows you to adjust height, even different heights for the front and back of the table. But it seems difficult to adjust on your own and I don't need the added front/back flexibility. However, in combination with a magnet or spring mechanism to fixate the height, this could be nice. I don't know how to build such a mechanism though and would be grateful for pointers!

Another thought was to extend the legs above the height of the surface and pull the surface up with a pulley mechanism.

This guy built a nice table, but has the same problem with changing height.

But I'm really open to other ideas as well. Any ideas/pointers/suggestions are very appreciated!

13


I recently bought a Kreg ACS Project Table combo kit. I did all the proper setup techniques. I cut my zero clearance line in the table. Installed all the measurement strips. All that setup, done by the book and YouTube videos.

I lined up all my stock against the bench dogs and started ripping…

After checking all the boards, they’re not all cut perfectly square! I thought the concept of this system was it was near impossible to get misaligned cuts? Anybody else have this issue? Help please! Haha

14
 
 
15


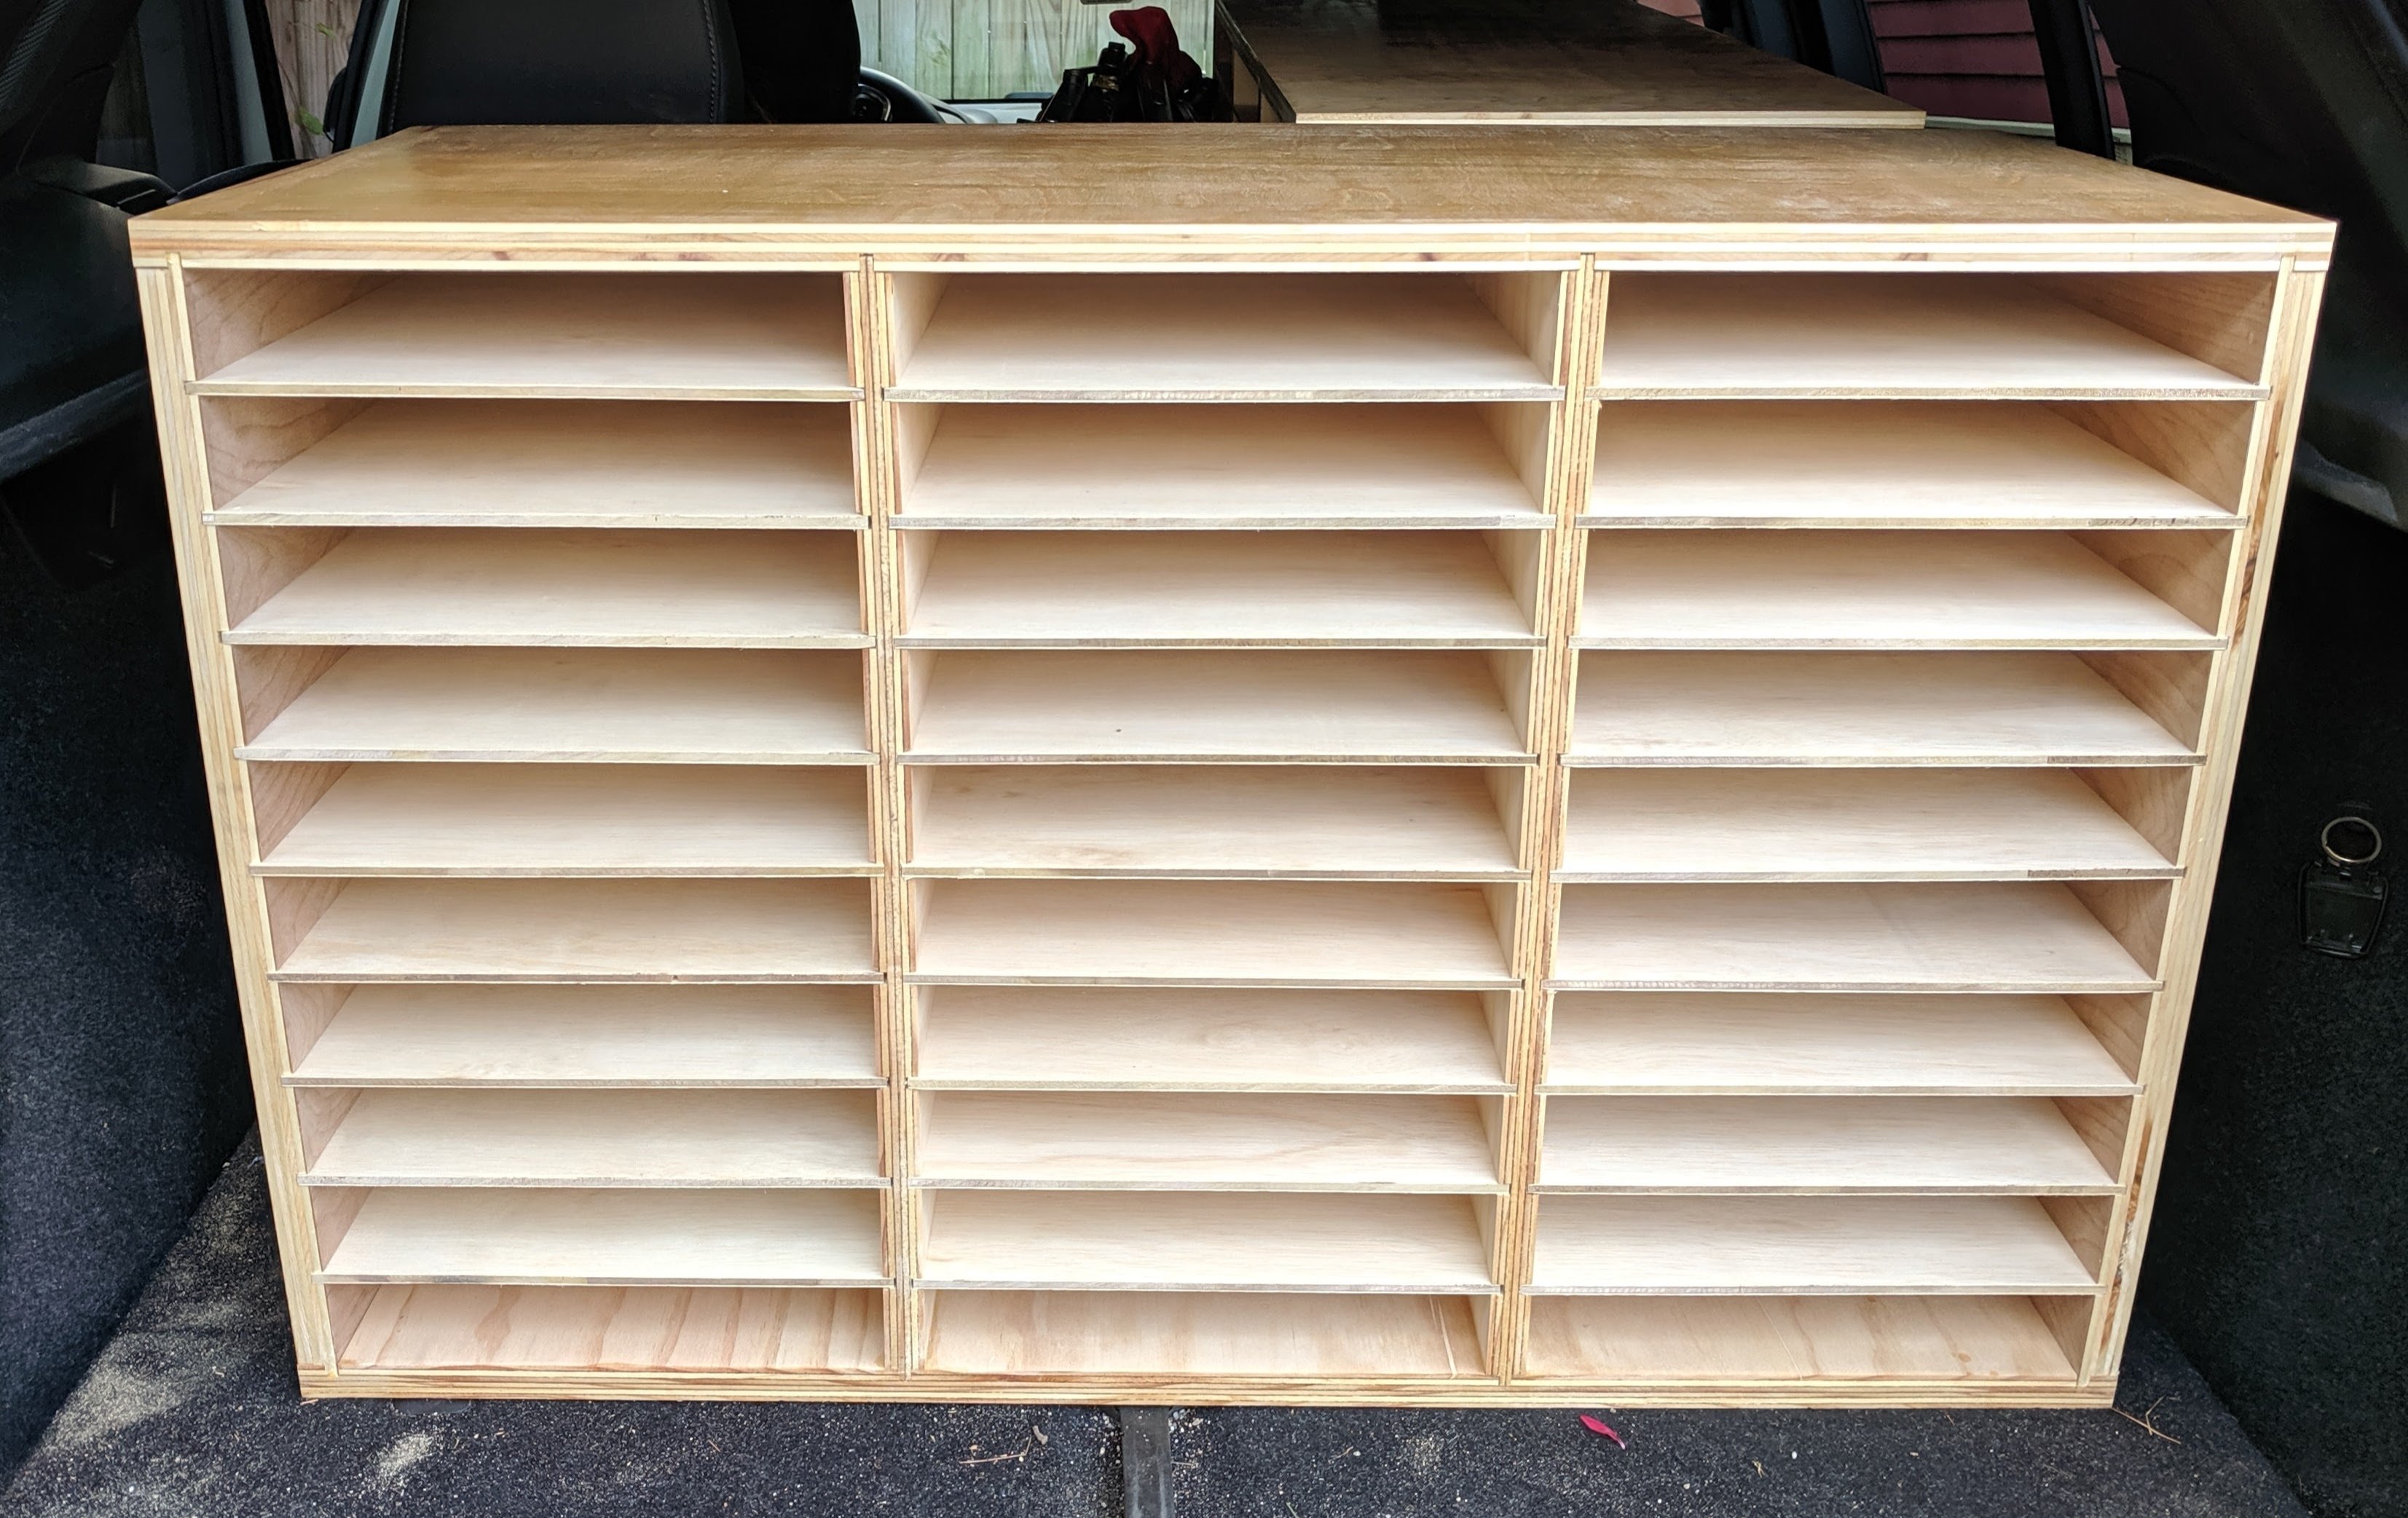
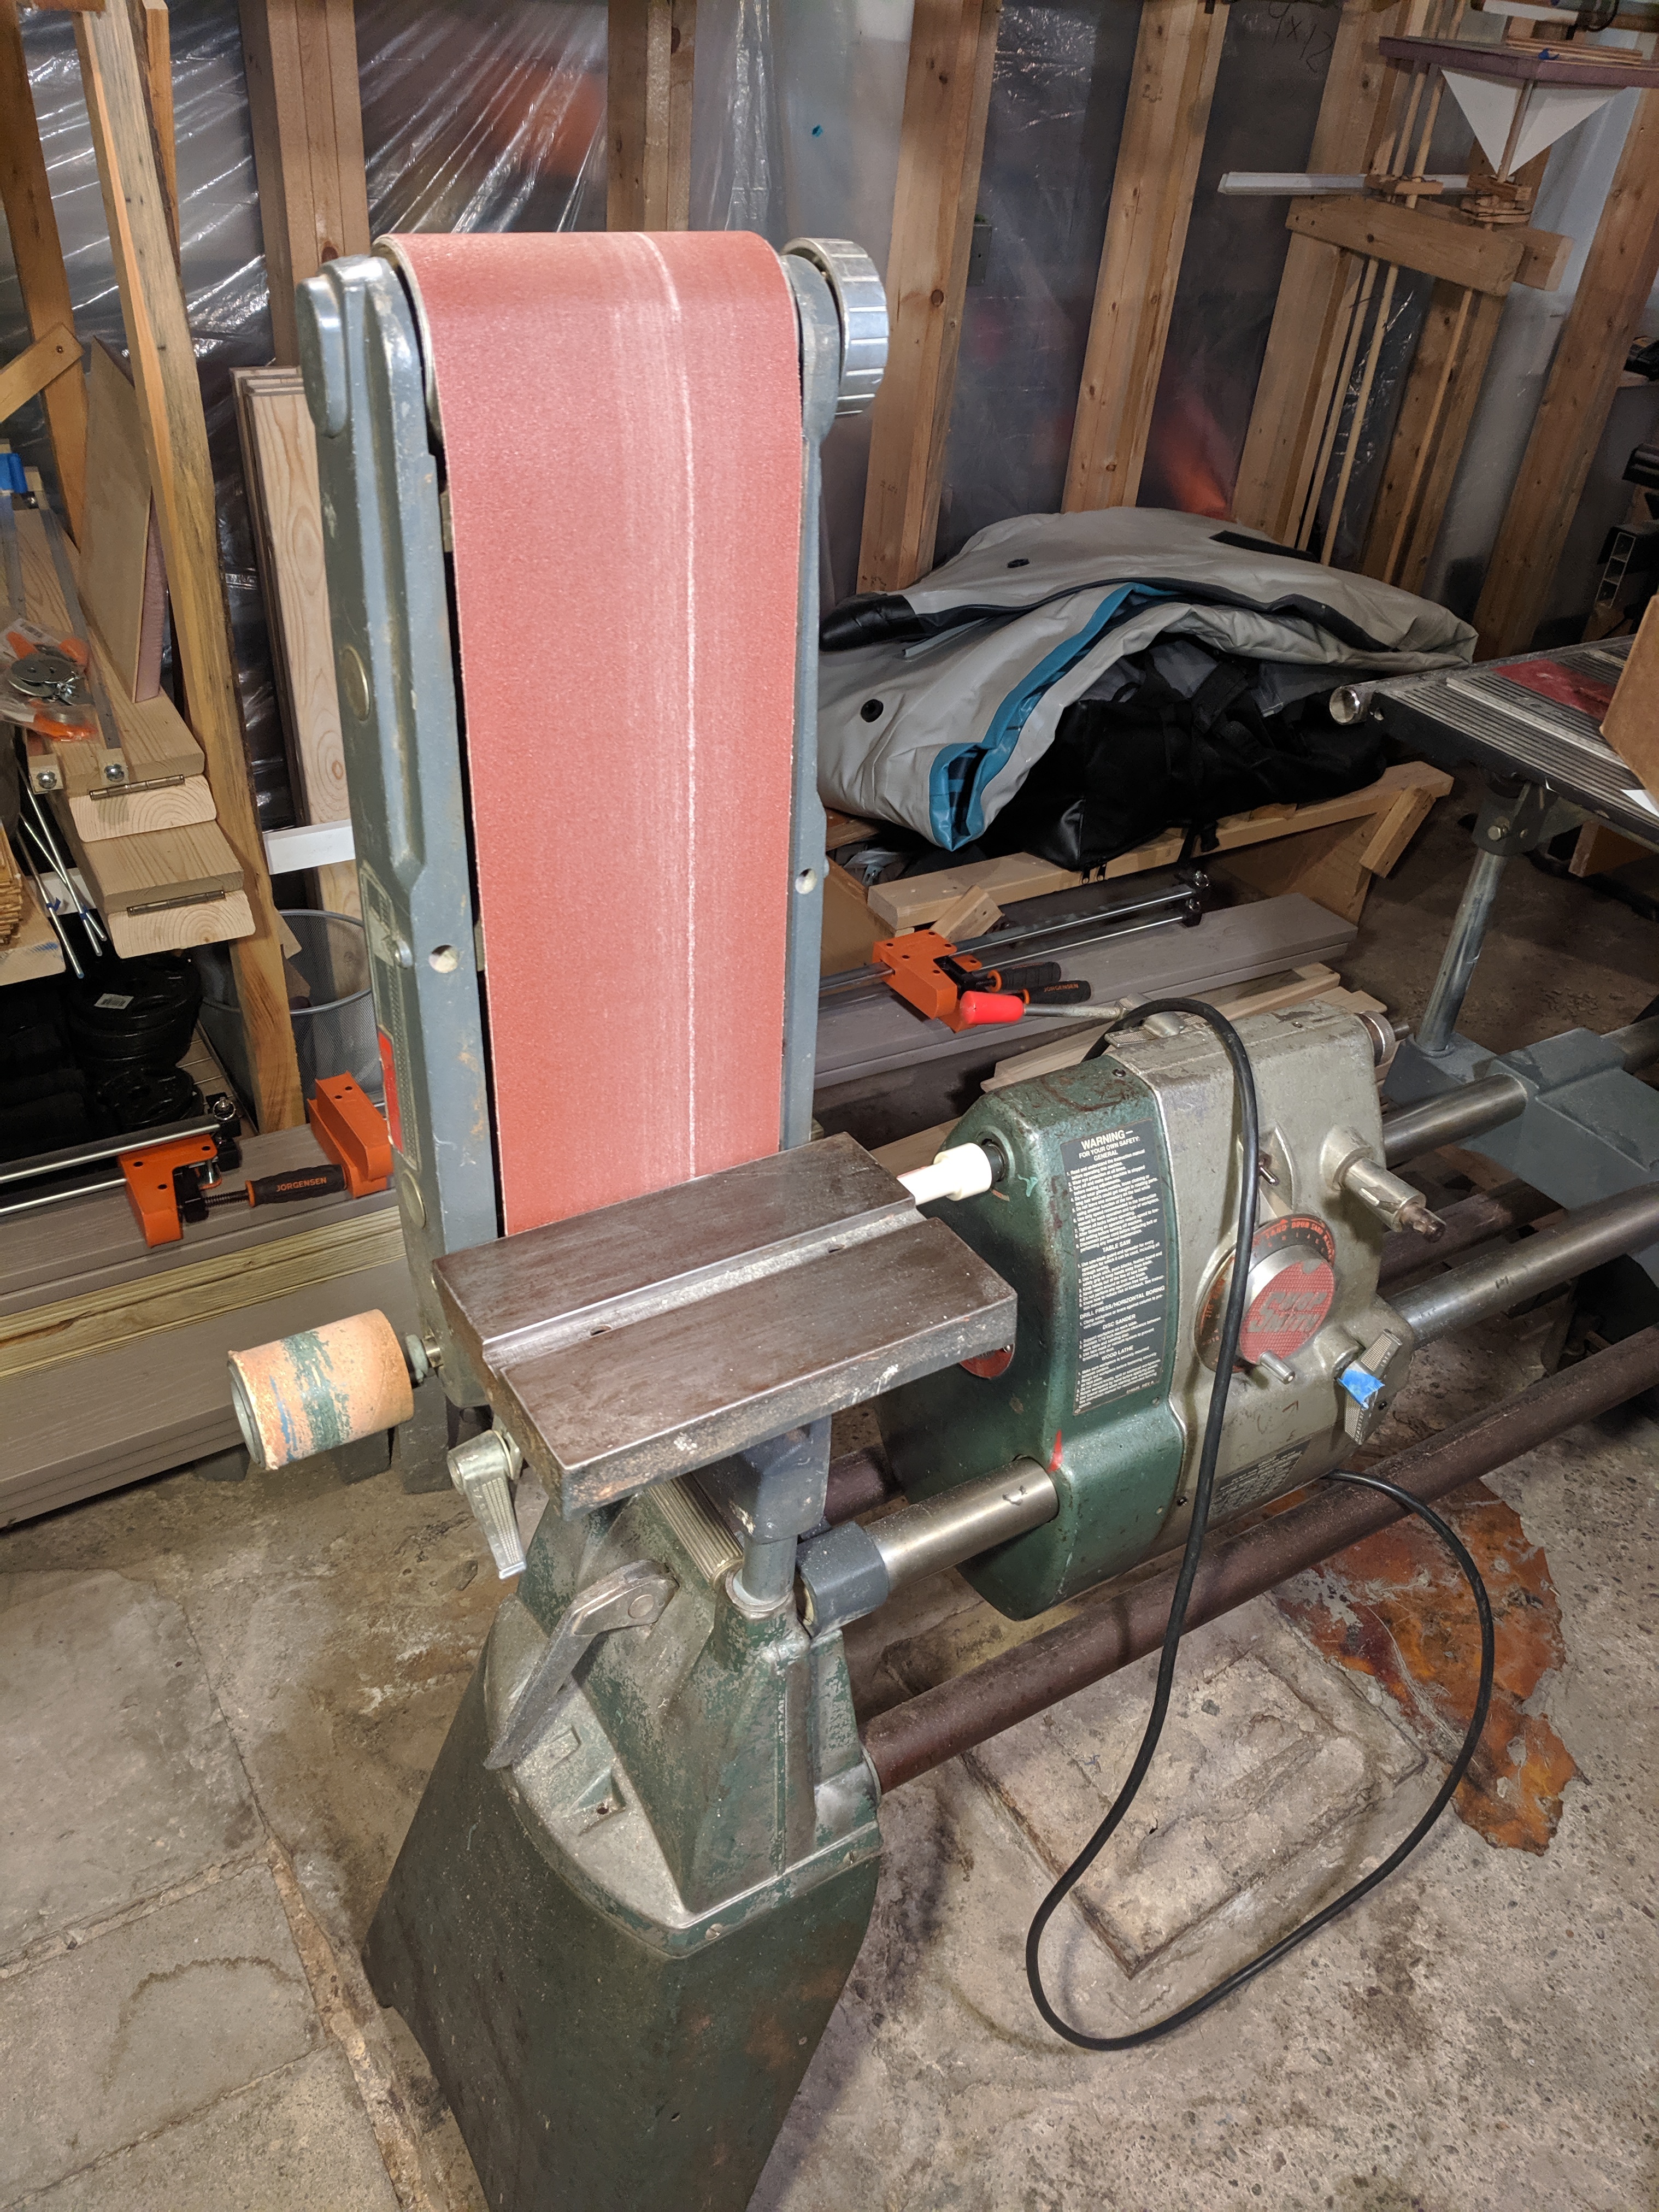
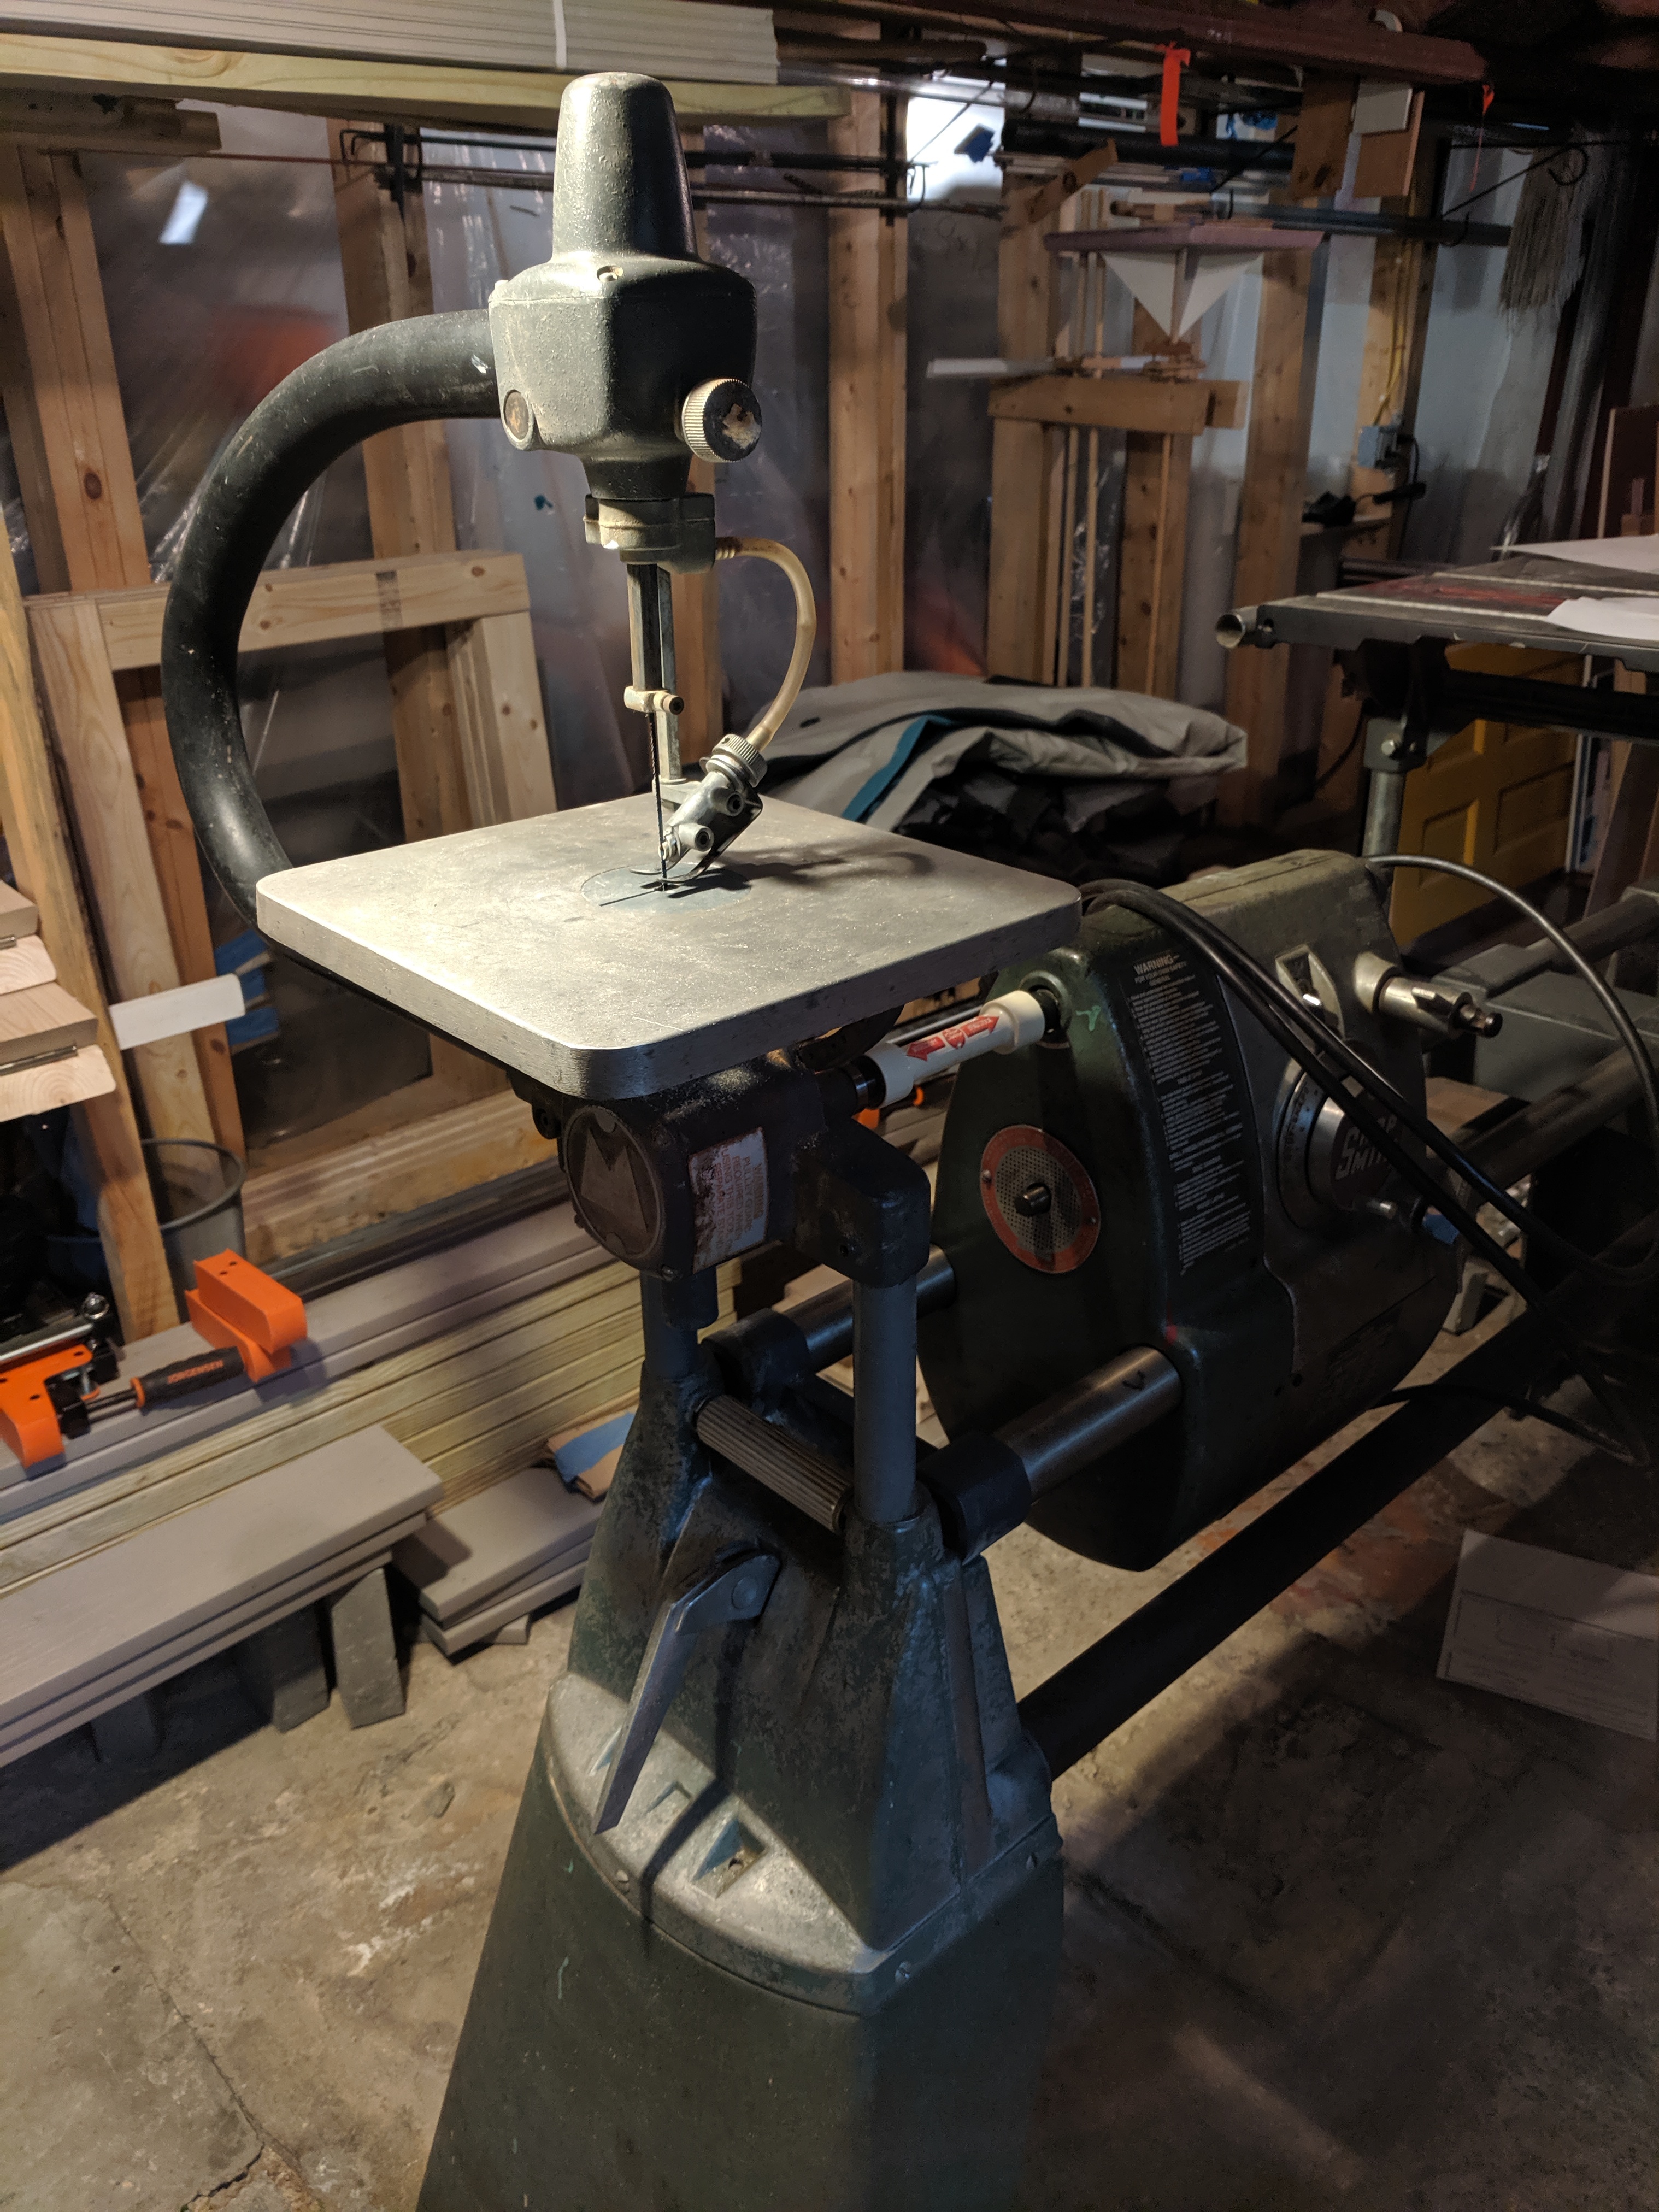
I wasn't expecting to be able to fit many tools in my basement shop area, so it was a pleasant surprise to learn about the Shopsmith. Pictured are belt sander, jigsaw, and drill press; I've also got the band saw, table saw, and lathe.

16


cross-posted from: https://lemmy.world/post/190570

Doing it by hand with sandpaper is a nonstarter.
Also I don't have a lathe :-/

17


What's everbody working on now? My main project is going to be storage for various places around the house. This weekend will probably be a quick rack for yard tools rather than anyrhing all that pretty.