DIY Simulators. Simracing, Flight simulators and more

632 readers
1 users here now

Discussion about diy simulator related projects.

Examples are simrigs, OpenFFBoard, OSW, motion systems, button plates, cockpits...

Show and discuss your simulators and peripherals here

founded 3 years ago
MODERATORS
1


I repaired my old Thrustmaster rudder pedals. That’s the one I upgraded using an Arduino Pro Micro before (PeerTube, YouTube) to get rid of their old D-Sub connector so this device is really old and probably belongs into a museum. I doubt I’d get any replacement parts for this from the vendor nowadays.

Their sliding beds are made of some sort of plastic and this started to become brittle over the years. When I noticed that one side was coming apart I found several more hair fractures so I had to stop playing with the pedals for a while.

Yesterday I went with one of the sliding beds to the Swablab, our local maker space, and considered cutting and milling new parts of wood, when a fellow maker suggested to use some leftover HPL pieces for the job.

This was far less complicated compared to what I had in mind and I went for it. After a few minutes in the workshop I ended up with two new sliding beds that I mounted today. Worked like a charm.

I went with Liquid Moly LM47 for some lube, simply because I have a tube of that around from working on the car. That’s grease for stuff like bearings and probably overkill for the job.

Couldn’t be happier. The pedals are back into service and feel even better than before (probably thanks to the new grease) and I avoided once more going for expensive modern replacements. I’m also probably the only one with rudder pedals with wood aesthetic now 🤓

Originally posted at https://beko.famkos.net/2026/04/16/thrustmaster-rudder-pedal-repair/

2


I'll miss my HOTAS / HOSAS / SIMPIT / DIY Discord channels starting next month.

Anyone knows some alternative Spaces on Matrix by chance?

I'm aware of the tiny https://matrix.to/#/#hotasdiy:matrix.org channel with 21 members. That's something I guess.

Acronyms: HOTAS = Hands on Throttle and Stick

HOSAS = Hands on Stick and Stick

SIMPIT = Simulation/Simulated Cockpit

HomeCockpit FlightSim Joystick Gamepad Controller

♻️ 🙏

3


So what happens when sheer stubbornness, a glorified button box, Ace Combat and the Unreal Engine Scripting System meet? Pure magic. I got the game to spew out a constant stream of telemetry data and events in search for more immersion in my VF-1 inspired home cockpit. The approach is the very same that I used for X4 Foundations before: Side load lib Luasocket, get a network connection established and start dumping extracted game data to it. This is highly experimental and the result of hacking away for the last ~4 nights.

This video demonstrates the results: https://makertube.net/w/cbXJAveVgVTGVEi58akVTA / https://youtu.be/50J-gjkgJxE (pick your poison)

To be perfectly clear: I am aware that Ace Combat is not a "flight sim", not really worth of an API, and I know that DCS or BMS does it better and in greater detail and even with realism. This is not the point. I started working on this just for fun and to satisfy my own curiosity to see if I can make it. This may be hard to believe but chipping rocks together until the computer does what I want is "quality time" for me 🤓

You may have noticed that I'm a Macross fan and that my SimPit is heavily inspired by a VF-1 Valkyrie and that I usually use a modded VF-1 plane in AC as well. This is my personal substitute for the lack of any decent Macross / Robotech game since Macross VOXP.

This said I usually fly Space Pew Pew games with this cockpit so everything you see going on is designed for space and not for flight sim. This is also why I sometimes talk about "ships" or "docked". This is wording found everywhere in my plumbing pipeline for telemetry. All games I play, that can use this, send their data over this. The idea is that I do not have to rewrite half of the connected systems for every game so I transform the data into a unified format before.

4


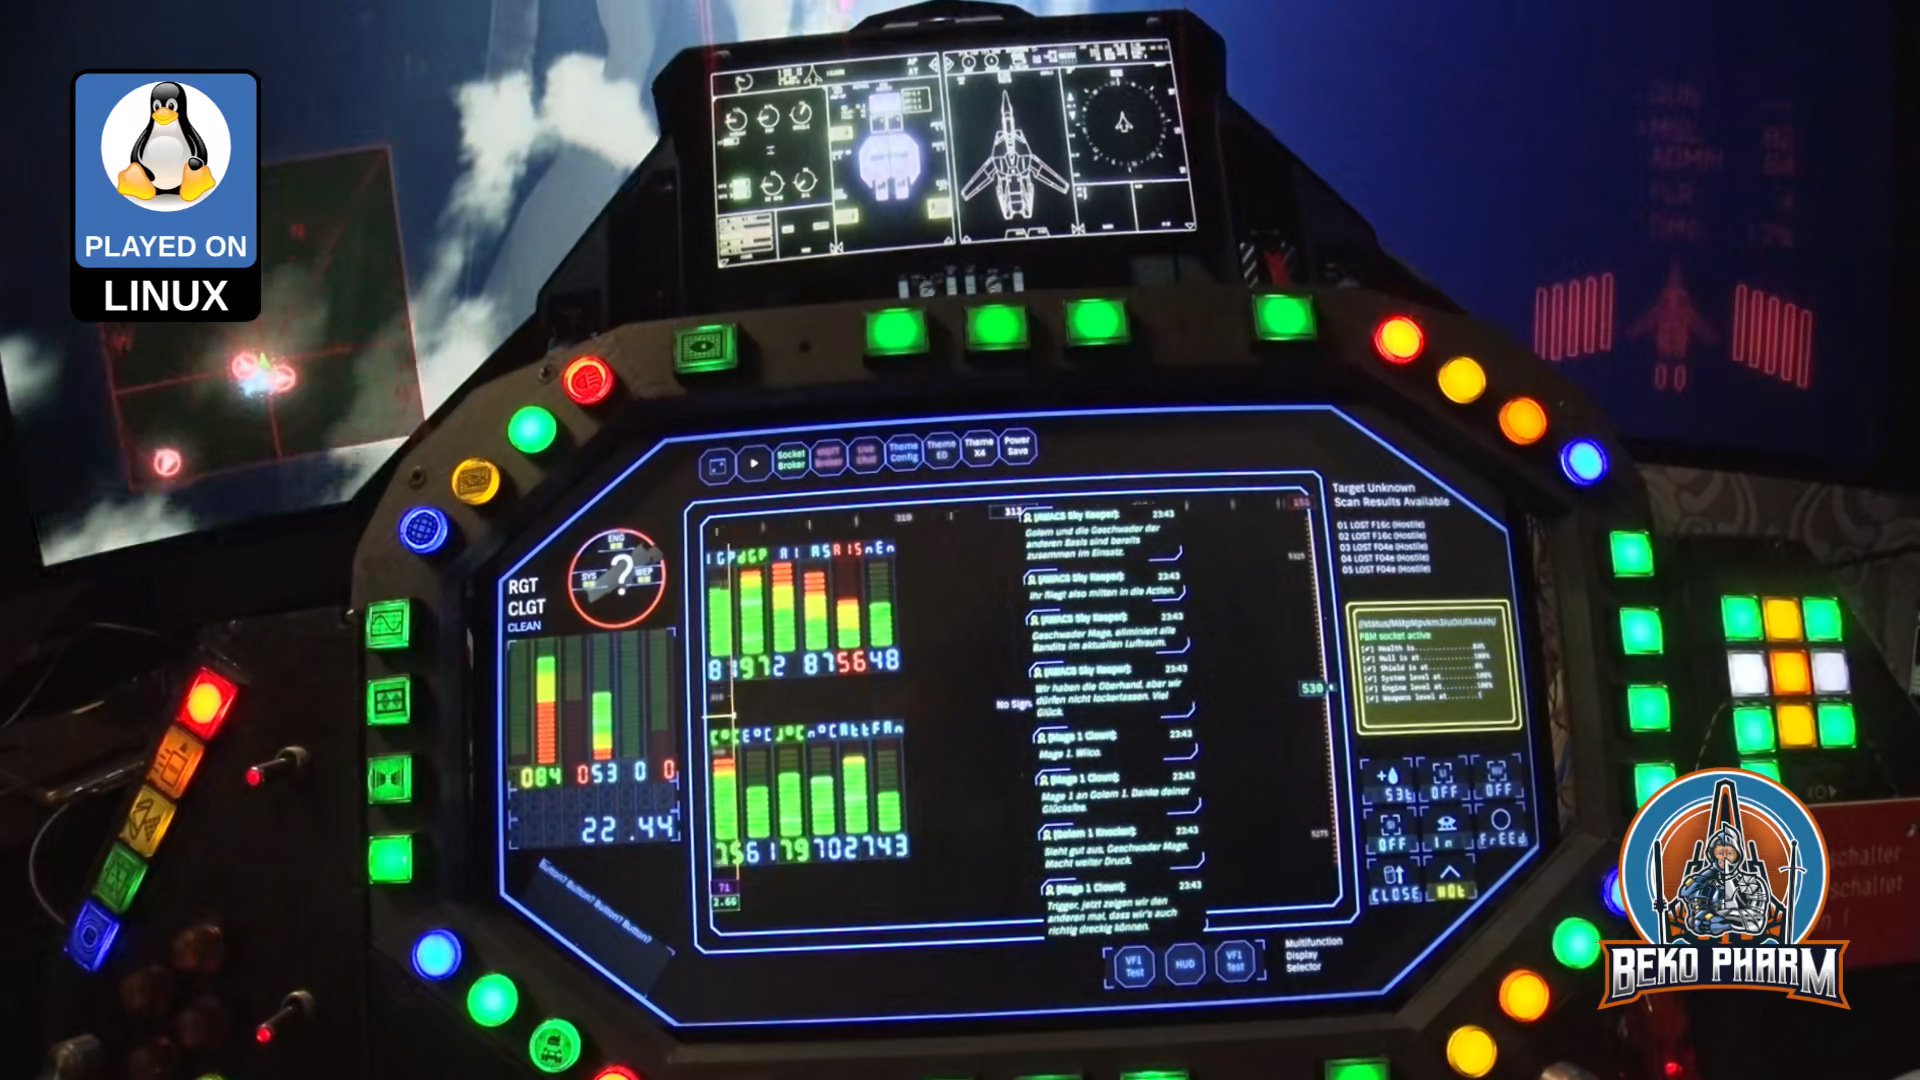
I replaced the old display in my VF-1 inspired home cockpit with a touch panel. The previous display was salvaged from a laptop years ago and had a poor viewing angle. To improve this I experimented with an anti-glare foil that reduced the annoying reflections. However, the viewing angle remained poor, of course. To address this, I decided to go all in with a touch panel kit.

Video: https://makertube.net/w/t2MfAwygD7pWYrMtnn96mT / https://www.youtube.com/watch?v=54nY9OdTAmc

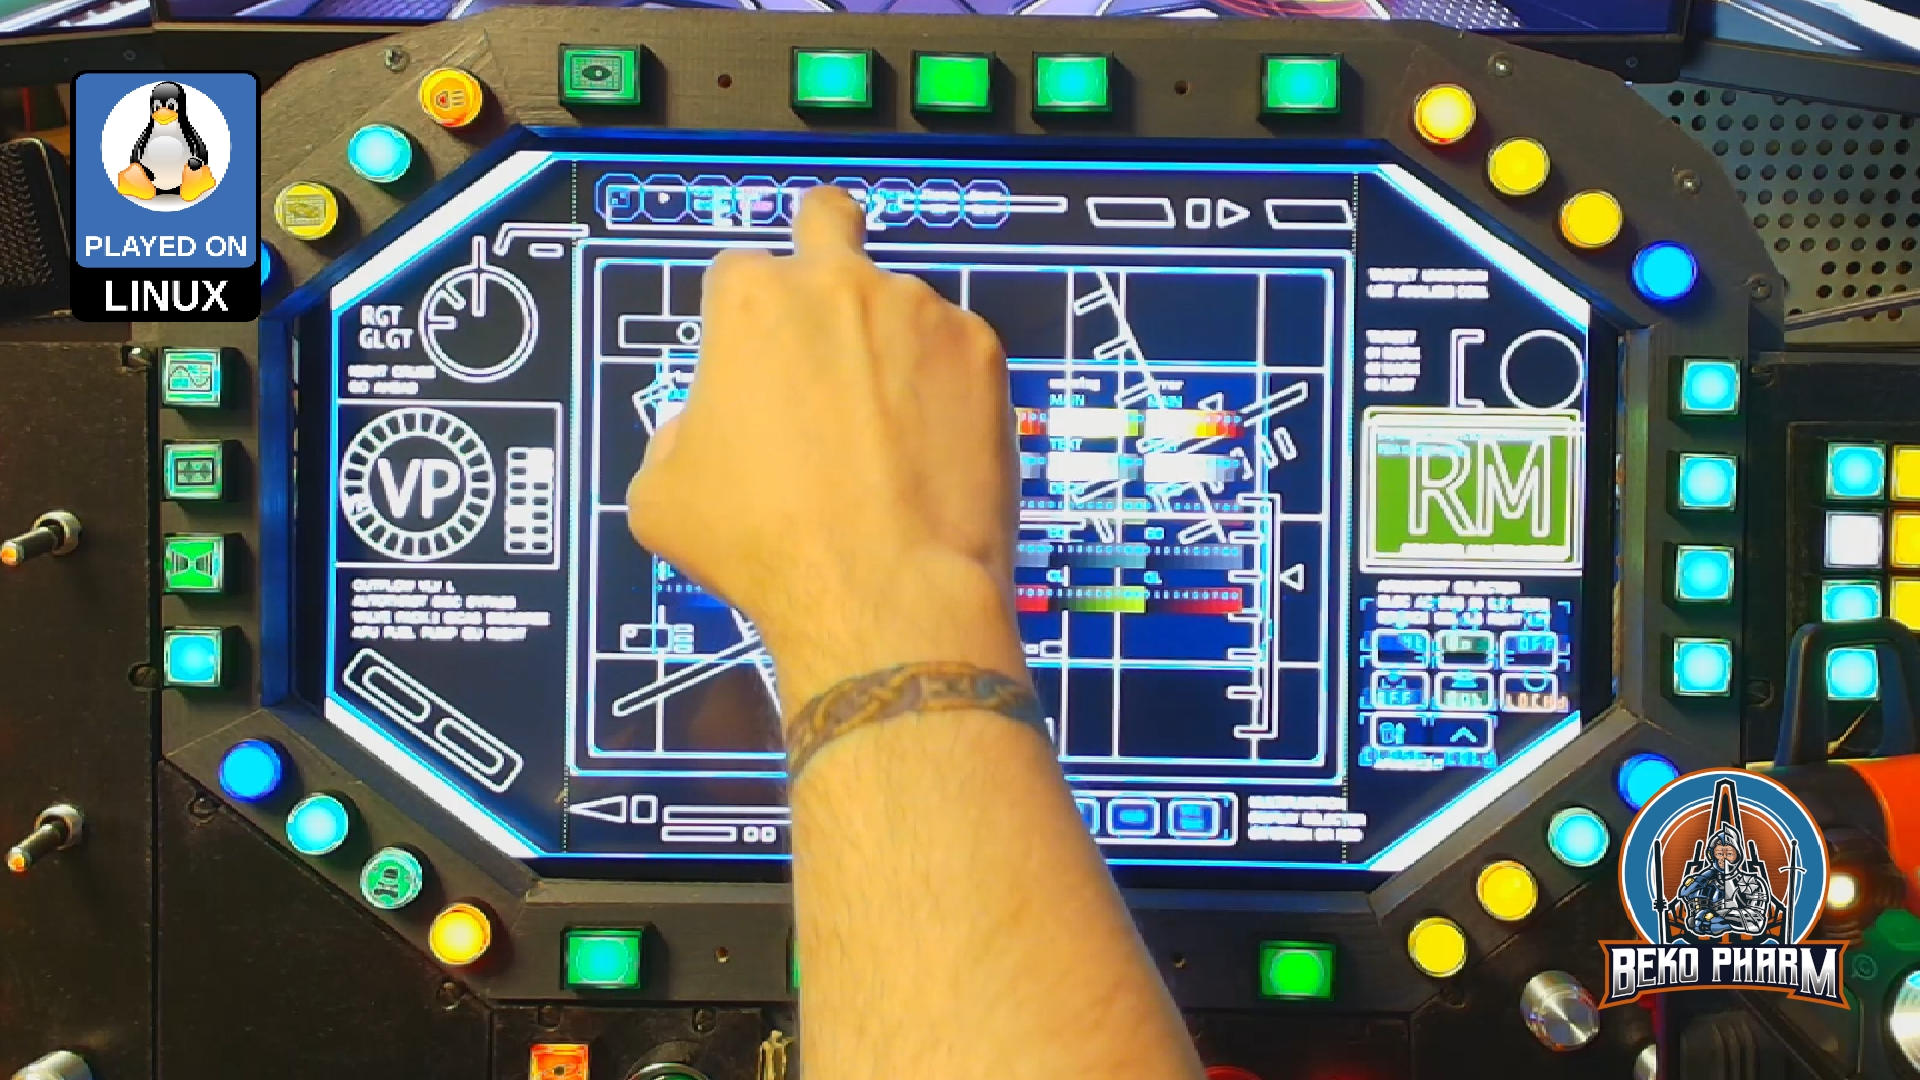
The display model is N173HCE-E31, a 17.3" with a resolution of 1920x1080 and HDR support. The touch controller registers as a USB HID pointer/mouse by ILITEK and is basically a transparent touch sensing foil sitting on top of the display.

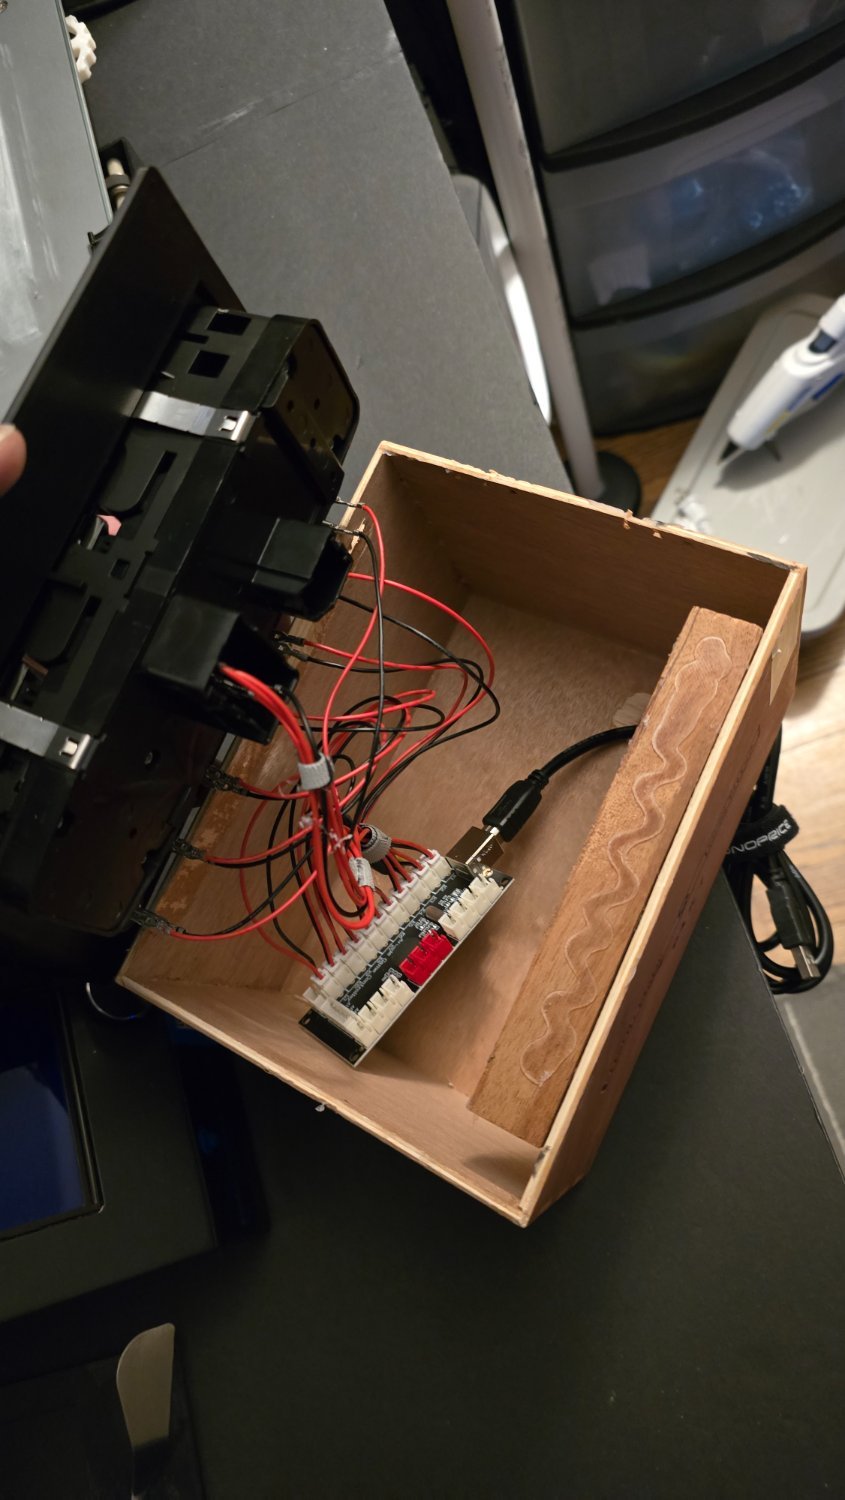
The kit included a PCB that was advertised as VS-RTD2556HC-V2 by VSDISPLAY but came without any data sheet. It is not clear to me who really made it. Also this PCB runs very hot and it's voltage was not explicitly stated. I slapped a heat sink with a tiny fan on top on it and tried different configurations. It does work with just 5V at ~2A but I feel way more comfortable with 12V at ~0.8A, where it's getting only slightly warm to the touch after running for an hour.

However, the controller ignores it's own PSU the moment USB-C is used for the display signal, and none of my devices with DP ALT could provide enough juice to power it over that, resulting in a reboot loop. The only device this worked with was my Viture XR charging adapter, which can indeed provide enough juice to power both the controller and other devices simultaneously.

To work around this issue I went back to using HDMI + PD along with USB2 for the touch panel signal. An additional fan is connected to the PCB's micro USB2 socket providing the fan with 5V. This worked well, but the result in a cable mess, that I initially wanted to omit. I wish I had a data sheet for this.

To fix the reflective glare, I went with a screen protector by BROTEC, which promises both anti-scratch and anti-glare effects without limiting any view angles. Attaching the foil was straightforward, but it is important to make sure that there are no dust particles around during the process. To help with this, I used an air humidifier to raise the humidity in the room before starting. After that I removed the protective cover from the display and started slapping on the foil with the provided mounting card (yay, cardboard again). I had to make good use of the also provided adhesive sticker to catch all dust particles in the end. Mostly thanks to one of my cats that decided to investigate what I was doing.

The end result is a dramatic improvement for the panel. I do no longer see the light sources or myself clearly reflected on the display. The touch panel is still accepting inputs just fine and the colors look very bright from any angle, especially with HDR enabled. This also eases cleaning because the cockpit panel is collecting dust like crazy due to it's angle. I usually use a vacum cleaner for this and the foil will help a lot to avoid scratches.

Ah yes and now that I have a touch panel I also started rewriting my HUD app, of course 🙃

Find a writeup of this video on https://beko.famkos.net/2026/01/14/switching-to-a-touch-panel-display-in-my-vf-1-inspired-home-cockpit-panel/ or on https://hackaday.io/project/192860-primary-buffer-panel-v2/log/245655-switching-to-a-touch-panel-display-in-my-vf-1-inspired-home-cockpit-panel/ with some more details, that didn't make it into the video.

5


Wohoo. I'm getting cockpit telemetry of Ace Combat 7 in LUA.

Edit: There be demo video now: https://makertube.net/w/cbXJAveVgVTGVEi58akVTA

Starting poking around UE4SS mod for Ace Combat and slammed rocks together for 2 hours and it started chirping altitude, speed and health 🤓

Just a proof of concept so far but this looks promising.

6


Got a new disk and reinstalled my system (Fedora 43). Followed my own guide how to compile Opentrack with the Neuralnet tracker plugin: https://simpit.dev/systems/opentrack/

Worked fine but needs some build dependency updates meanwhile, like qt6 instead of qt5. Still amazed how good the Neuralnet tracker with ONNX runtime is.

Short demo video: https://makertube.net/w/bC93YNXQ4aE4ha5xwufPJC

7


First spin with 5K UHD 2160p Ultra Wide (45GX950A-B OLED, 45"). Banana for scale.

This is an absolute monster of a display and replaced my triple 24" setup that I used for years. It's a little bit less in wide compared to my old setup but a lot higher . Will need some time to adjust properly but the immersion is mind blowing. Brief demo: https://makertube.net/w/fb6fsA5PtJiFbBTxbMk67X

8


cross-posted from: https://lemmy.zip/post/51305553

I've been wanting an F1-style steering wheel for sim racing for ages, but I didn't want to spend massive amounts of cash on a commercially-built steering wheel that could be great but had loads of features I didn't care about (especially LEDs and a screen) since I play in VR.

A colleague of mine, who is also into sim racing, built a steering wheel that was better than almost anything you can find from Fanatec/Moza/Thrustmaster/whatevs for around 500€.

So, of course, I decided to ~~buy the same thing~~ build it myself from scratch for the challenge and to save some money. Because I'm an idiot, I guess. I thought it would take me 2-3 weekends. It took 4 months. It's basically a wheel-shaped mechanical keyboard. It was the biggest non-essential project of my life. I learned a lot, including not getting myself delusional enough to start that kind of project on a whim.

Steering wheel's back

Features:

  • F1-shaped steering wheel, heavily inspired by Ferrari's one with the general shape and front. Back is closer to Mercedes'.
  • Magnetic shift paddles
  • Analog clutch (WIP)
  • 7 rotary encoders
  • 10 face buttons + 2 back buttons + 5 clickable encoders
  • Quick-release connection to the steering column
  • Aviator-style USB connector
  • QMK firmware
  • Everything is 3D-printed except for the aluminium mid-plate and the quick-release

If you guys are interested I have a few WIP pictures, so I could start a build log. WDYT?

Installed Front Installed Back

9


This is Project Wingman mission 01 Black Flag played on a Linux PC with Proton Experimental, OpenTrack with the Neuralnet Tracker plugin and my DIY HOTAS / rudder system based on Arduino Pro Micros replacing the original electronics in my Thrustmaster FLCS/Cougar gear:

Pick your poison: https://makertube.net/w/8MyoVSzDfwMuQR6bCqtbie / https://www.youtube.com/watch?v=dq0sihlgW_Y

I got Project Wingman on a sale months ago and I finally gave it a try. As an Ace Combat player I felt right at home. My initial experiment was with the XR glasses and woah that feels good in 3D and all but today I remembered that old Plasma TV in the basement. Got it second hand a year ago for dead cheap. Today I brought it upstairs to try it with the ViperPit and now I’m not sure what’s more awesome.

Well, that is if I feel like burning ~470W on top for that thing but hey this is for very specific gaming sessions only anyway 🤷

Guess I’ll spend more time in the ViperPit again 😀

10
11
12


Finally replaced the old display with the new touch display for my VF-1 inspired home cockpit panel: 🎥 https://makertube.net/w/5uLBzaawSVwqVCjcGfjSfC

The display is the N173HCE-E31, a 17.3 inch with 1920x1080. The touch registers as a USB HID Mouse by ILITEK and is basically sitting on top. I never noticed before but while cramming it in I noticed that it's a little bit lopsided 😩 Ah well, it's hardly noticeable.

Sadly I made no progress for the rewiring and pushed that back. I really have to clean this eventually but that'll result in a long downtime for the cockpit.

I did however make progress with the HUD app. Initially I had no touchscreen support in mind so I had to rewrite a lot of code. This forced me to take a closer look at the UI elements and I found so many bugs and optimized so much. Still in the middle of tweaking which is why there is a lot of debug visible in the video. I'm very happy with the result though and I think I'm really getting that Valkyrie VF-1 vibe going 🤘

Read more on the dedicated project website https://simpit.dev/

13
14


Quick demo time: I got a touch display 17.3" that will replace my rather old one in my VF-1 inspired cockpit panel.

Pick your poison: https://www.youtube.com/watch?v=KX4LsyqYPCA / https://makertube.net/w/nCopvNbkvkwR9XcG5QPQ3i

Mostly because of the bad viewing angle. I'm not a huge fan of touch but sometimes it is really useful and if I already spend money why not go the extra mile :nerd:

15


This uses my X4-SimPit extension for X4: Foundations, that sends ship telemetry via a socket to my node-red plumbing pipeline, which in turn forwards data to Websockets, SocketIO and MQTT. Various subscriber listen on the new messages to run blinken lights and my HUD app. I’m using the well known message format also used by Elite Dangerous so it’s compatible with that game as well.

Pick your poison: https://makertube.net/w/nUoG2ZPeAW1QhT3A2BXRrM / https://www.youtube.com/watch?v=wp1PkVhH9cc

Oh yeah… and on Linux PC 🤓

Let me know what you think!

X4-SimPit code (pending changes) is here: https://github.com/bekopharm/x4-simpit The cockpit panel has a dedicated project page here: https://simpit.dev/

16
17


Should I just buy the cheapest PS3 Eye camera from ebay and see whether I get the flat lens or round lens, and proceed accordingly?

Its a real hassle to determine if its a flat or round lens from the photos people upload on ebay, as they're not very good quality.

Edit: I found a really cheap one on ebay which was at auction and got the highest bid (it was a little over 4 euro with another 4 shipping, so honestly not bad at all). When it arrives I'll try out the steps in the video and report back here I guess. Hopefully it can help people when buying these cameras to not struggle looking for the rounded lenses and worry that if they dont get that one they cant do their project.

18
19
20
21
22


My ViperPit got an awesome upgrade today. It’s a pressure activated heating mat for the seat usually used in cars (12V are 12V 🤷). For the record: I have to heat full power to get my cave to 18C during the wintertime wasting a lot of energy. This doesn’t make much sense so I’m really happy with my solution that I also have in use for my office chair for years now 👌

23


Got some help carrying the ViperPit from the basement into my man cave today and since I got the peripherals operational again already, and got Ace Combat 7 on a sale, which seemed to be a good fit, I decided to play that first: https://makertube.net/w/wiKFYNPaKhhCmrrz3aGLYb / https://www.youtube.com/watch?v=HEPK0lHX_3s

Little did I know what a pain in the neck it would be to get this running. No, Linux wasn't the problem. That was just Press Play, as usual.

There is however no settings menu for HOTAS joysticks so any mapping has to be done by manually editing the Input.ini of the game in an text editor, which is a guessing game. Head tracking is also a no go. I pulled the old trick to map the head tracker to a virtual XBOX controller but the game comes with an annoying deadzone where the camera snaps to the center.

Ah well, got it all working okay-ish in the end and enjoyed some pew pew in the skies. There seem to be plenty of Macross mods too so trying that will be next 🤘

24


This is just using a sheet of foam core board from the dollar store. It's almost done. I have the lower panel, parking brake and trim wheel still to work out. It's coming along

25


Interview: In depth walkthrough of my insane home cockpit panel with BekoPharm and Ozoned

https://makertube.net/w/bufv9BJv2vcXDb3KUaksB7 / https://www.youtube.com/watch?v=CpP7KS1fbrY

@ozoned@video.thepolarbear.co.uk interviewed me on my #homeCockpit on a live stream via his #Owncast instance at https://stream.ozoned.net/. This is a more condensed version of the stream that is still just 1h shy. We're going over almost every feature of my Primary Buffer Panel and I explain how everything works. I also decided to add various photos, slideshows or video snippets during the talk only sections so things don't get too boring. Sometimes that even complements the talks 😄

Ever wondered how to start your own DIY cockpit / SimPit? It's easy. Just watch this stream 🤓

Dedicated project website: https://simpit.dev/

Check out the original recording if you want to see more or the full stream with more [dirty] details: https://video.thepolarbear.co.uk/w/9zNcweVw2fxxpSrmBnaQJa

view more: next ›